Console administration
Services and integration keys
Create a service, issue its first integration key, test the paging path, and rotate credentials without interrupting alarms.
A service is the system or area of responsibility that an incident belongs to. Its escalation policy determines who WarnFire pages. An integration key lets one monitoring source create and update incidents for that service only.
What an integration key is
An integration key is the service-scoped credential included with every Events API alarm. It does two jobs:
- authenticates the monitoring source; and
- routes the alarm to the service whose escalation policy should run.
A complete live key begins with wf_live_ and is supplied in the JSON
request’s integration_key field. This is the complete key issued during the
documented validation run. It was revoked after capture and cannot
authenticate:
wf_live_NmG54bE2EM7bA_DsKVW9hc4LGFLUFWZERZGUWrDynt4
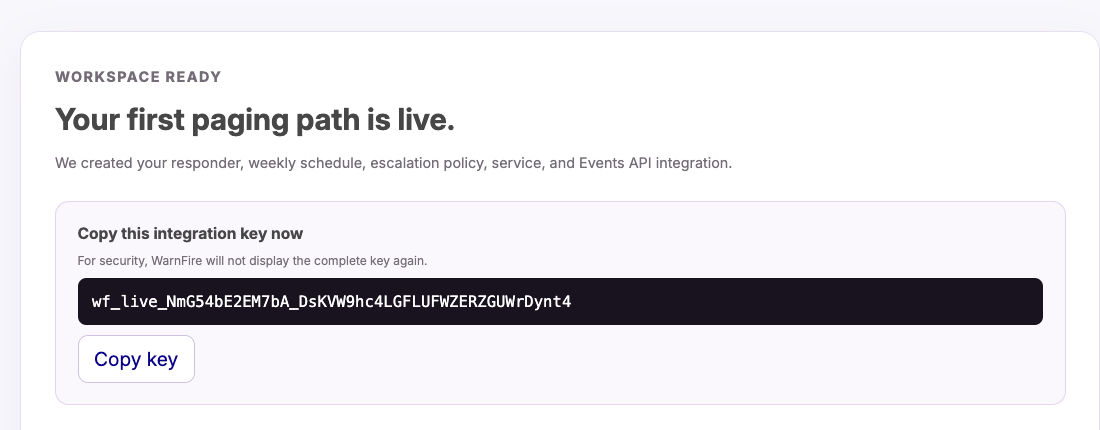
The key appears in the dark field. Select the image to open it full size.
Before you begin
You need tenant-owner or tenant-administrator access. Create the escalation policy that should handle incidents for the service. Decide which monitoring system will send the first alarm, and have a secret manager ready for the key.
Create a service and its first key
- Open Configuration → Services.
- Under New service, enter a recognizable operational Name.
- Select the Escalation policy that owns incidents for this service.
- Select the first Alert source. This changes the endpoint and authentication instructions shown after creation; the key itself works with every supported source.
- Select Create service + integration key.
- In Your new integration key, select Copy key and store it in the secret manager. WarnFire will not show the complete key again.
- Copy the displayed endpoint or open the linked setup guide.
- Select Done — I’ve copied it.
Create one service for a system with a distinct operational owner or escalation path. Do not create a separate service for every alarm rule, host, or container.
Add a key to an existing service
Use a separate key for each independently managed monitoring source:
- Under Create an additional key, select the Service.
- Enter a descriptive Key name, such as
Production Grafana. - Choose an expiry and the warning periods for expiry and inactivity.
- Set Events per minute. A value of
0uses the plan limit; a key can impose a lower limit but cannot raise the plan limit. - Select Create integration key.
- Copy and store the key before closing the one-time display.
The service list shows each key’s status, disguised value, creation time, last use, expiry, and effective event limit.
The key controls mean:
- Expires is when WarnFire stops accepting the key. The console offers Never, 30, 90, 180, or 365 days.
- Expiry warning marks a still-active key when its expiry is within the selected number of days. It has no effect on a key that never expires.
- Unused warning marks a key after the selected number of days without a successful event. For a key never used, WarnFire measures from its creation time.
- Events per minute is a trigger ceiling for this key.
0uses the plan ceiling; any positive value can lower but never raise that ceiling. Resolve and acknowledge events do not consume trigger slots.
Rotate or revoke a key
To rotate without interrupting alarms:
- Select Rotate beside the active key.
- Copy the replacement key from the one-time display.
- Update the monitoring source and send a test alarm with the replacement.
- Confirm that Last used changes on the replacement key.
- Select Revoke on the old key and confirm the warning.
Rotate creates a second active key named after the old key with
replacement appended. The replacement defaults to no expiry, the plan event
limit, a 7-day expiry-warning setting, and a 7-day unused warning; it does not
copy the old key’s settings. Review those defaults before adopting the
replacement as your long-lived credential.
Revocation is immediate. A sender still using the revoked key receives a 401
response, so do not revoke the old key until the replacement has been observed
in use. WarnFire also refuses to revoke the last usable key on an enabled
service.
Verify it worked
Verify the service path
- Select Send test alert beside the enabled service.
- Confirm that WarnFire opens the test incident automatically.
- Check that the incident names the expected service and captured escalation policy.
- Confirm that the intended responder receives the page.
- Have that responder acknowledge the incident and confirm that its status changes to Acknowledged.
- Open Delivery Activity and confirm the expected attempt and strongest available evidence.
- Select Force resolve, enter a reason that identifies the incident as a service-path test, and confirm that it closes.
The test follows the real escalation path. Do not run it without notifying the responder who is currently on call. It validates the service and policy, but it does not prove that a particular newly issued or rotated key works. SMS and voice consume allowance or prepaid credits for every contacted destination.
If delivery or acknowledgement fails, use Force resolve with a reason that records the failed test before troubleshooting the path.
Verify a specific key
Send a disposable Events API trigger using the exact key your monitoring source will store:
curl --include --fail-with-body \
  --request POST 'https://api.warnfire.com/v1/events' \
  --header 'Content-Type: application/json' \
  --data '{
    "integration_key": "YOUR-INTEGRATION-KEY",
    "event_action": "trigger",
    "dedup_key": "integration-key-validation",
    "payload": {
      "summary": "Integration key validation",
      "source": "documentation-check",
      "severity": "info"
    }
  }'
Confirm all of the following before replacing or revoking another key:
- The response is
202 Acceptedand returns an incident identifier. - Last used changes on the intended key, not a different key on the service.
- The incident belongs to the intended service and the expected responder can acknowledge it.
- Send a
resolveevent with the samededup_key, or resolve the incident in the console with a reason, and confirm that it closes.
The trigger follows the selected escalation channels. SMS and voice consume allowance or prepaid credits for every contacted destination.
Next steps
- Run the complete configuration-readiness and end-to-end test .
- Connect a provider-specific webhook adapter or send a trigger through the Events API .